
Folding Chair Plans: How to Build Your Own
A basic wooden folding chair is a weekend project. You need a few boards, a saw, a drill, a bolt or hinge for the pivot, and a plan. That’s the gist.
The folding mechanism is what makes this different from building a regular chair. Everything else, the legs, the seat, the back, is straightforward woodworking. Getting the pivot right is where first builds succeed or fail.
Here is what to expect before you start.
What a folding chair plan includes
A good plan gives you four things: a cut list, dimensions for every part, an assembly sequence, and a clear diagram of the folding mechanism.
The cut list tells you how many pieces to cut and at what lengths. Dimensions tell you how the parts relate to each other. The assembly sequence matters because some joints need to go in before others close off access.
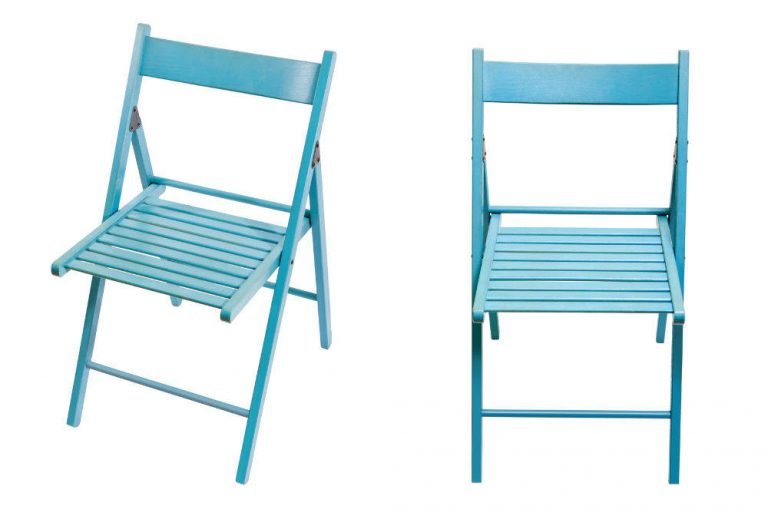
The mechanism diagram is the most important page in any plan. It shows exactly where the pivot sits, how the two frames cross, and what stops the chair from folding flat when someone sits in it.
Without that detail, you are guessing.
Where to find plans
Free plans are available from woodworking sites and maker communities. Sites like Instructables and Craftsmanspace have published folding chair and camping stool plans with cut lists and step-by-step photos. Woodworking-focused YouTube channels often pair a video build with downloadable plans.
Paid plans, usually $5 to $20, tend to be more detailed. They typically include tolerances, hardware specs, and 3D model files you can rotate and examine before cutting anything.
SketchUp’s 3D Warehouse is worth browsing even if you do not buy a plan. Community members have posted folding chair models you can rotate in the browser to understand how the joint geometry works.
If you are comparing styles before committing to a build, the guide to types of folding chair covers the main forms, from flat stools to full lounge chairs.
Skill level and tools needed
A simple folding stool or camp chair is a beginner build. A chair with a back, armrests, and a precise stop mechanism is an intermediate one.
The tool list is short.
- A miter saw or circular saw for straight cuts
- A drill for pilot holes and bolt holes
- A square for checking angles
- Clamps to hold pieces during assembly
You do not need a router, a jointer, or specialty jigs for a basic folding chair. Lap joints and through-bolts handle the pivot on most beginner plans.
Wood choices
Most free plans are designed for dimensional lumber, meaning the kind you buy at a hardware store already milled to standard sizes.
Common choices:
– 1×3 or 1×4 pine or poplar for lighter chairs and stools. Easy to cut, inexpensive, finishes well.
– 2×2 or 2×3 pine for heavier chairs that need more structural bulk in the legs.
– Hardwoods like oak or maple for a more finished result. They hold screws better and handle wear, but cost more and take more effort to cut cleanly.
The wood you pick affects the materials cost significantly. Pine keeps a simple chair under $30 in lumber. Hardwoods can push that over $60 even for a small chair.
Inspect each board before buying.
Sight along the length for bowing, and skip any board with large knots near joints or pivot holes. Knots create weak spots exactly where you need strength.
The key design challenge
A folding chair has two separate frames that cross each other at the pivot. When you sit down, those frames need to stop at the right angle and hold that angle under load.
The stop is what most first builds underestimate. The pivot lets the chair fold. The stop prevents it from folding further when someone sits in it.
Common approaches:
– A cross-brace or stretcher that contacts the opposite frame at the correct angle
– A ledger strip on the seat frame that the leg frame rests against
– A routed channel that limits travel
A pivot that works but has no reliable stop produces a chair that slowly closes under a sitter. That is unsafe. Test the stop mechanism with downward pressure before calling the build done.
The pivot itself is usually a single carriage bolt with a washer and a wing nut, or a hinge pair if the design uses a fabric or webbing seat. Both work. The bolt approach is simpler for wood-on-wood frames.
Tips for a first build
Make a prototype in cheap pine before cutting any nicer wood. A $12 board is an acceptable test piece for a pivot that might take three tries to dial in.
Cut all pieces before assembly. Fitting parts as you go creates compound errors.
Drill pivot holes slightly oversized so the bolt can turn freely. A tight bolt that binds will split the wood over time.
Sand everything before assembly, not after. Getting a sander into folded joints after the fact is awkward.
Seal or oil the wood if the chair will live outside. Pine left unsealed grays and checks within a season.
If a full build sounds like more than you want right now, the best folding chairs guide covers the ready-made options across plastic, metal, and wood.