How To Hang Folding Chairs On Wall
Folding chairs are easy to fold flat for carrying and storage. There are a few ways to store them and to optimize your storage space in a garage or storage room.
This article will explain how to store folding chairs and how to hang them on the wall in case you live in an area with limited space.
Product We Like
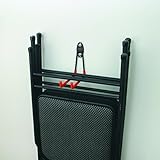
Monkey Bars Storage Rack is a great option to hang your folding chairs on the wall.
Folding chairs serve as extra seating for guests to sit on. When not in use, they can be simply folded up and stored in the garage or closet.
In any organized garage or storage room, it’s essential to make every square inch of wall space do some work.

Image: NZACE Adjustable Storage System / Wall Mount Tool Organizer from Amazon.
You can neatly store many items that are difficult to stack with inexpensive wall hooks and racks.
Folding chairs can be hung on the wall, opening up a ton of floor space and making it much easier to get ready for family parties.
Folding chairs are usually so LIGHTWEIGHT that it is easy to lift them on the wall rack.
They also fold flat, so they don’t take much space. Note that some cushioned seats might be bulkier and more cumbersome.
Options on How To Store Folding Chairs
1) Leaning Against a Wall
What it is: Placing folding chairs on the floor and leaning them against the wall offers some flexibility. However, if you have more than a couple of chairs, it takes too much of your floor space.
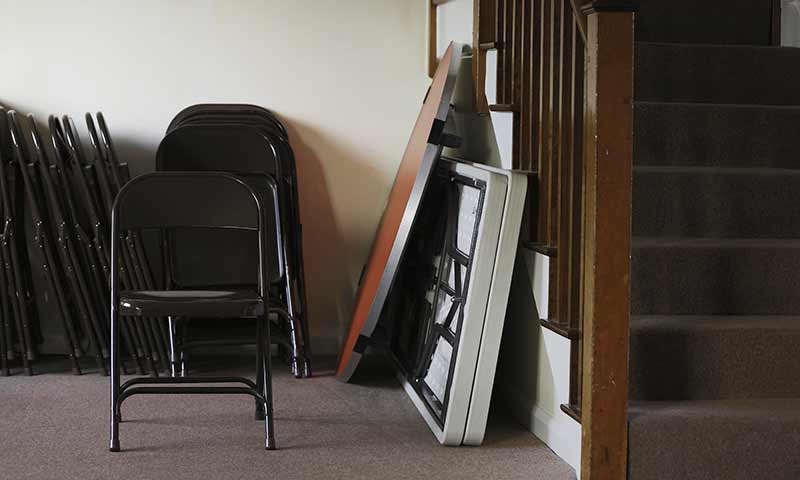
Size of space: You need enough wall and floor space clearance to accommodate this solution.
Benefit: No holes to drill or nails to hammer, and it’s a great option if you have free floor space and insufficient wall space to hang them. And chairs leaning on the wall are easy to take out when you need them.
Limitations: If you have small children or pets, this is probably not the best route to choose. You need to be able to move the folded and stacked chairs to clean behind them. Somehow, this scenario only looks good if you don’t want to drill any holes, or as a temporary solution.
What you will need: Nothing else than free floor space.
2) Hanging on a Wall with a Rack
What it is: Install a ready-made rack on a wall, and hang the chairs on the hooks to keep the floor clean. Chairs are up on the wall and out of the way without scarifying the space.
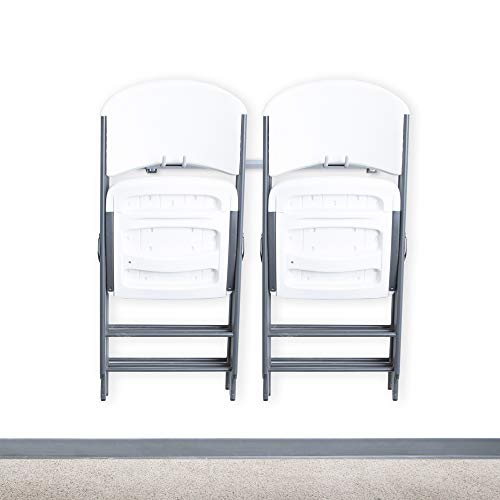
Size of space: You need enough wall space to accommodate this solution, and you need some clearance to take the chairs out of the hooks when needed.
Benefit: It’s a great option if you have limited floor space. If you have small children or pets, this is a great choice.
Limitations: Need to drill holes, so you need some equipment. You need to find studs or support beams to support the weight of all the chairs in the rack.
What you will need: Storage Rack, Stud Finder, Level, Power Drill, 3/16” Drill Bit, Pencil, Hammer, and a Nail.
Recommended product:
Alternative if you don’t need that much storage space:
PS. Stud Finders are really cheap and easy to use. CH Hanson 03040 Magnetic Stud Finder is bestseller in Amazon.
Steps on How To install the Rack on the Wall
Note: See the manufacturer’s instruction manual before attempting to install the product, and use eye protection when drilling. Check for electrical wirings inside the wall before drilling.
Step 1:
Studs are a must for installation if you are going to hang more chairs. Because the rack will be clasping a reasonable quantity of weight, the drywall might not be capable of supporting the load.
Use the stud finder to locate a stud for the mounting bracket. As soon as you find it, create a mark with a pencil.
Choose a position that does not need reaching too far to place and take away the chairs. Do not install the rack too low or else it will take up lots of floor space. Do not fix it too close to the ceiling to have some clearance for the items to place and take away.
Step 2:
Lightly tap a nail into the wall to verify that a stud is there. Drill a hole according to your bracket (usually a 3/16” hole, 2 inches deep). Just make sure that you drill into the center of the stud.
Step 3:
Screw the first mounting bracket in its place. Do not over-tighten the screws.
Step 4:
Find another stud of the same height for the opposite mounting bracket. How far you should go depends on the length of the bar (if the bar is 50 inches, then look for the stud around 48 inches or less away.)
Step 5:
Slide the hanger bar into the first bracket. Place a level on top of the bar and have the bar as a guideline to mark the location of the second bracket.
Step 6:
Install the second bracket. Tighten all the screws cautiously.
Step 7:
Place the bar and the hooks. Test the rack by applying pressure on it. Place the chairs.
3) Make a DIY wall rack
What it is: You can make a DIY wall chair rack. This plan does not take many items and time, and it’s easy to do. It’s an affordable solution as well.
Size of space: You need free wall space, preferably a sturdy wall, or you need to find studs on the wall.
Limitations: Need some tools and knowledge on how to use them. Takes more time than installing a ready-made rack
What you will need: Lumber Board, Hand saw or power saw, Stud Finder, level, power drill, 3/16” drill bit, pencil, hammer, and a nail.
Steps on making a DIY Rack on the Wall
Step 1:
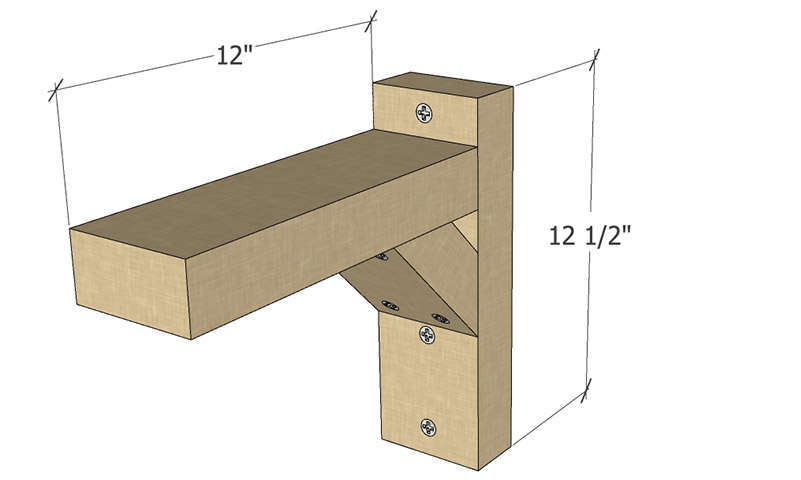
The first step is to cut the wooden supports. You can use wood leftovers that you might have in our garage or purchase a 2×4 lumber board. Cut the board into 3 pieces with a hand saw or power saw.
Cut one segment into a 12-inch piece to serve as a cross beam. For the vertical wall mount, cut another part into 12.5 inches. The 6-inch segment will act as the support for the cross beam. Dimension don’t need to be exact.
Step 2:
Make a bevel cut on both ends of the 6-inch cross beam support segment, so it fits evenly with the vertical wall mount segment and the chair support segment.
Use a power drill to fasten the cross beam to vertical support with screws from the backside.
Use a hammer and nails, or power drill and screws, to fasten the cross beam support onto the wall mount and the cross beam.
Drill 3 holes in the wall mount center.
Step 3:
Next, you have to find a wall stud. Use a stud finder to look for the stud or support beam at the back of the drywall. Create a mark with a pencil.
Step 4:
Determine a proper height for the rack. Using a pencil, mark the folding chair height on the wall and line up the 12.5-inch wall mount with the stud marking at a height you prefer.
Mark the location of the holes in the wall, and drill the 3 starter holes into the wall.
Step 5:
Use a power drill to fasten the rack on the wall with screws.
Before hanging folding chairs on the wall, test the rack by employing pressure on it.
When it’s secure, position up to 5 chairs on the cross beam. You can also make some small end cabs for the cross beam to prevent the chairs from sliding off.
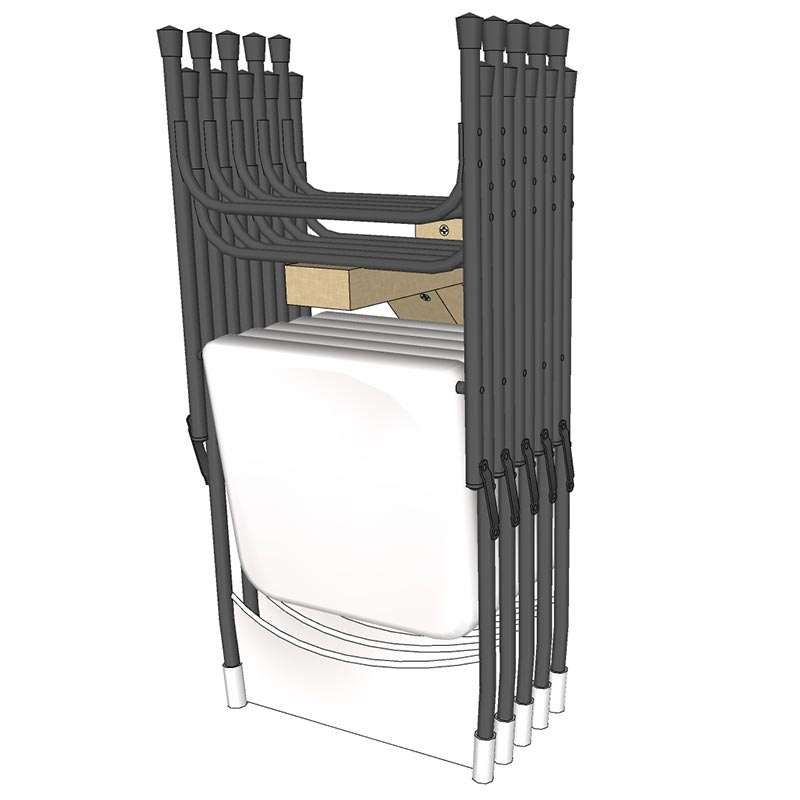
You can choose to create more racks if you have a lot of folding chairs, and you can use the racks to hold other stuff too.
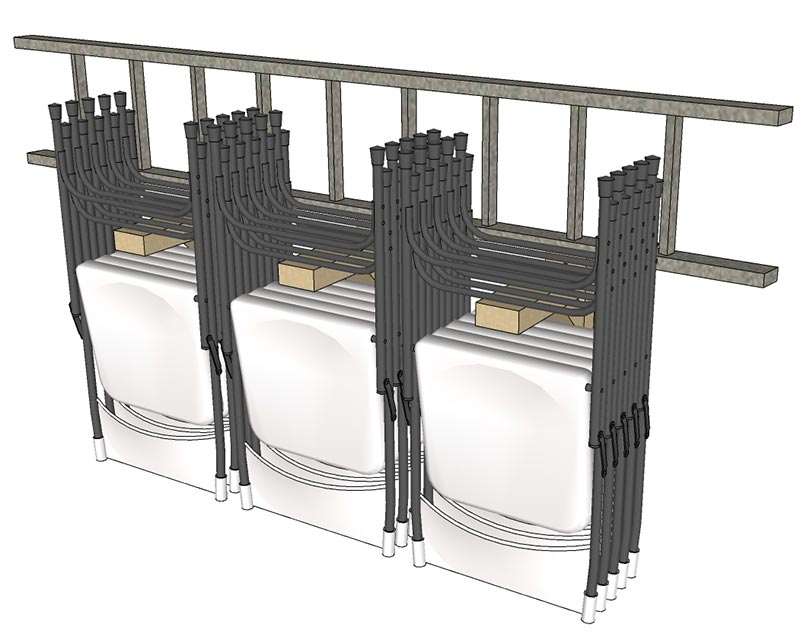
The wall racks will keep your folding chairs organized and stored neatly, and they will not take up lots of room in your home anymore when not in use.
We hope we have answered your question – “How To Hang Folding Chairs in Storage Rack or on Wall?”
If we have and now, you think that it is about time you get a folding chair for yourself or somebody else, you can check out our review on the best folding chairs over here at openbackyard.com.
Side note:
If you are in a church, school, or meeting facility, and you need a convenient way to move, setup, and store a large number of chairs,
the folding chair dolly will save you time.
The chair rack makes it easy to maneuver and stack the chairs during set up and break down at all your special events.
No products found.


